Monday, 23 December 2013

Season's Greetings

Wishing all my followers a very Merry Christmas and a Happy New Year.
 

The trouble with having more than one blog means that occasions such as Christmas and New Year have to have more than one seasonal pic.   Not this year!   I know a few of you follow all three of  blogs but some just follow one so if you see this pic more than once, I apologise!
 

Thursday, 28 November 2013

York Fair

 
It has been a couple of years since I was last at this particular fair and I decided to combine it with a bit of Christmas Shopping, which was all well and good until it came to lugging all my purchases round the fair!   Thankfully a very kindly soul (the husband of a fellow miniaturist) let me stash my bag (Bag A) in his car for the duration of the event.   That meant I could whiz round with Bag B and stock up on all the minis I needed!
 
I managed to get the necessary bits for all three projects and these are some of the finishing touches for the Hall.   There's some wooden trim (for the external staircase), two Thomas Crapper loo roll boxes (I've had my eye on those for ages), a Christmas Storage box kit for the attic room and a magazine for the lady of the house.  
 
I know I'm supposed to have finished the interior but there's always that little something else that has to be had!
 

The additional bits were some acetate for windows, some extension sockets (I've not used these before but figured they might come in handy) and a set of keys.   No idea where they're going yet but some pewter-y coloured paint and they should fit right in somewhere.


All in all (although it doesn't look like much there) I had an excellent trip.

Sunday, 10 November 2013

We have a balcony.

 
Well, it's taken some time but at last I have finally given the balcony on Hambleton Hall some railings.   I've had these "railings" for ages but hadn't plucked up the courage to do anything with them.   I thought initially that they would be tricky to install but it turned out to be pretty straightforward.
 
 
It really finishes off the front, I think.
 
 
The topiaries are resin with flat backs and were purchased from The Dolls House Emporium although they don't appear to have that particular style available at the moment.
 
All that is left to do now is deal with the baseboard and grand staircase then work my through the snagging list.
 

Saturday, 17 August 2013

Janey, the Servant


Janey the Servant's room was the last space to be decorated inside the house.   It's taken me since 2005 to get to this point and it's still not finished.

First of all, I had to dull down her wallpaper a bit.   It was far too bright and new looking for a servant.

 
Then a cupboard and wall-light were added -
 
 
Then I had a little play -


Of course she now had to have furniture to store her worldly goods.   She needed a washstand complete with toothbrush, toothpaste, soap and nailbrush -
 
 
No servant went anywhere without her box -
 
 
It's nice to finally be able to show, in situ, the bonnet sent to me by Marlene 
 
 
She has her secret little Valentine card hidden under her pillow -
 
 
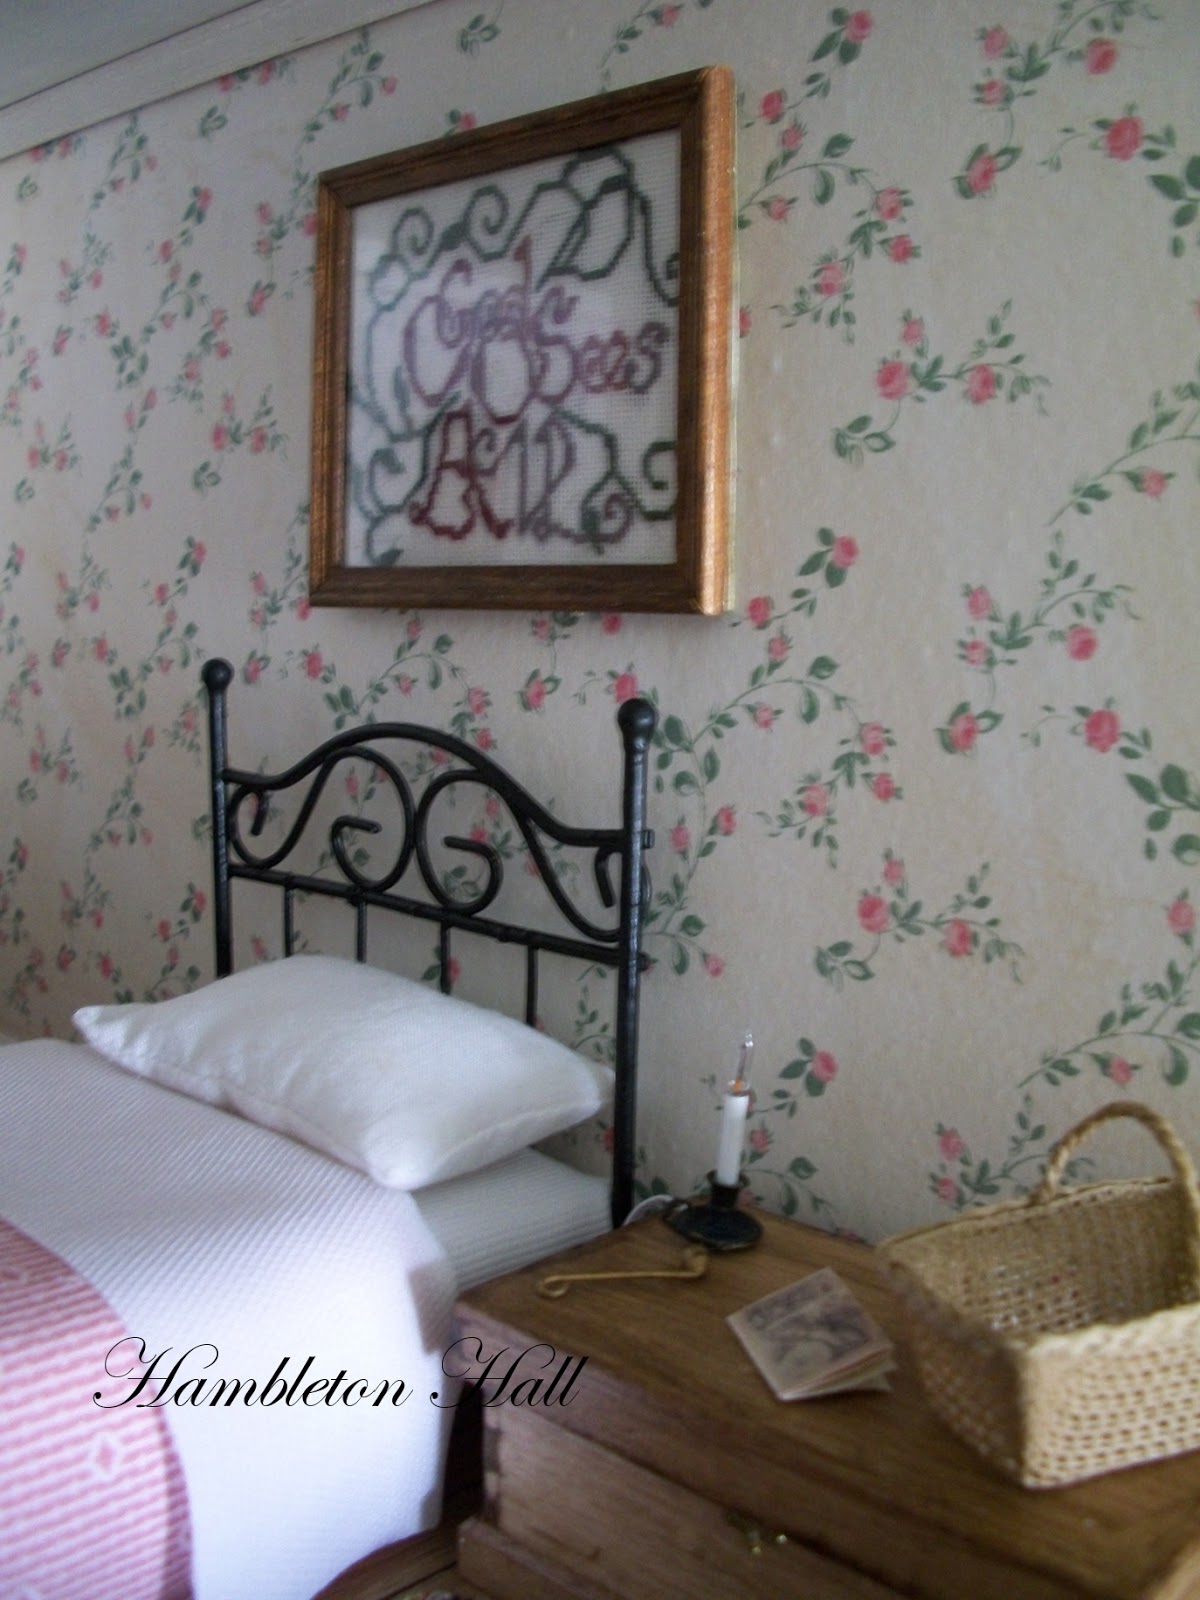
The Penny Dreadful she's really not supposed to read - but does anyway - immediately beneath the stitched message that says (in case she should ever forget) "God Sees All" -
 
 
And finally, the whole room -


It was a bit sad completing this room.   I really enjoyed doing this one and learnt how to make a few little bits along the way.
 
Just the "grounds" to tackle now!


Tuesday, 21 May 2013

Towel Rail, Tiles and Toothpaste.


Janey, the Servant, now has a wash stand boasting a towel rail and tiles.


I've also added a tin of toothpowder and a mug for her toothbrush.


She also has a piece of white rag for use as a facecloth and a plate to hold her soap and nailbrush.

No excuses for this girl!   After all, cleanliness is next to Godliness!


Shortly after posting my last batch of pictures, I received a message from Marlene at Somerset House to say that she had a bonnet that was surplus to her requirements and which would be ideal for this setting.
 
The little bonnet arrived today and it's lovely!   I'm waiting on starch drying at the moment and once that's done I can put the little bonnet in place.   In the meantime here are a couple of pics to show how lovely it is.


Thank you Marlene.   It was a lovely thing to do and very much appreciated.
 

Saturday, 18 May 2013

How to make a hairbrush

 
A few people have asked how I created the hairbrush so I thought I'd share the process with you.

Step 1.

Take a paintbrush.   Any paintbrush.   I used a cheap artists brush for this.   Trim the bristles so that they're absolutely flat along the top then add a layer of glue.   Leave to dry thoroughly. *


Step 2.

Draw your hairbrush shape onto a very thin piece of wood.


Step 3.

Using a craft knife, roughly cut round your hairbrush shape.   (Sorry it's fuzzy but you get the idea).


Step 4.
 
Gently sand/file round the shape until you're happy with it and it resembles a hairbrush.   I used a needle file.


Step 5.

You can either paint or wax your brush.   I used brush on/buff off wax.


Step 6.

When the glue has thoroughly dried on the bristles, add a layer of glue to the hairbrush form, gently lay it along the top of the bristles making sure everything is in alignment and leave to dry.


Step 7.

Cut the hairbrush from the paintbrush allowing extra to trim.   Ensuring that the bristles are well and truly stuck to your hairbrush, trim them to size.


You are now the proud owner of your own hand made mini hairbrush.


* The instructions for how to deal with getting the bristles on the brush were found here:  about.com 

I am not in any way affiliated to this site but there are lots of very useful hints and tips to be found there relating to miniatures. 
 

Thursday, 16 May 2013

Bits and Bobs

 
Inspired by the very talented Pedrete and following through with my statement that I love to see drawers, cabinets and boxes with contents, I've been busy creating a few bits and bobs for Janey, the Parlour Maid in Hambleton Hall.
 
The wash stand is in need of a towel rail and some tiles and I'm working on those but this is what I've managed to come up with so far.
 
 
On the wash stand there's a little writing case.   It actually contains envelopes and writing paper but since I didn't take a photo before tying it shut and the chances of getting the bow tied if I open it are pretty slim, you take it from me, they are in there!
 
There's a fancy box she kept from some long ago gift that contains some family photographs and a box of violet soap that she keeps for her afternoon off.  
 
I also had a go at making a hairbrush, nail brush and toothbrush - certainly not to David Edwards' very high standard but I'm happy with them given I've not done anything like that before.
 
 
Below sits her box.   This was the only item a servant would have to hold their personal belongings - I find it also doubles up as a very useful bedside surface.
 
In the box there is a length of fabric for her to make herself a dress and of course the obligatory family bible given to her by her mother when she went into service and which will hopefully keep her on the straight and narrow!   The final item is a little romance she enjoys reading when she finally manages to get some time to herself.


blogger templates | Make Money Online